How to Scan on Canon PIXMA?
If you own a Canon PIXMA printer, you know it’s more than just a printing device. These all-in-ones are designed to easily handle scanning, copying, and even wireless printing tasks. Whether you’re digitizing work documents, saving family photos, or emailing signed forms, learning how to scan with your Canon PIXMA is a skill worth mastering. In this blog, we’ll walk you through the many ways to scan with your Canon PIXMA, including scanning from your computer and scanning from your smartphone.
Preparing to Scan on Canon PIXMA
Before you start scanning, there are some preparations to make sure everything goes smoothly. As with any technical task, scanning works best when the hardware and software are in sync.
First, confirm that your Canon PIXMA printer is fully set up.
If you are using a USB connection, plug it securely into the printer and computer.
If you prefer wireless scanning, make sure your PIXMA printer is connected to the same Wi-Fi network as your computer or mobile device.
Next, install the necessary software.
Canon offers tools such as IJ Scan Utility and My Image Garden that are both easy to use and free. You can download these tools from the official Canon support website. Make sure your drivers are up to date and compatible with your operating system, whether it is Windows or macOS.
Once the setup is complete, you can start scanning.

Methods of Scanning with Canon PIXMA
There are a number of ways to scan with your PIXMA printer, depending on your preference and device setup. Each method has its advantages, so we’ll cover the most common ones: using Canon software, scanning directly from the printer, and mobile scanning.
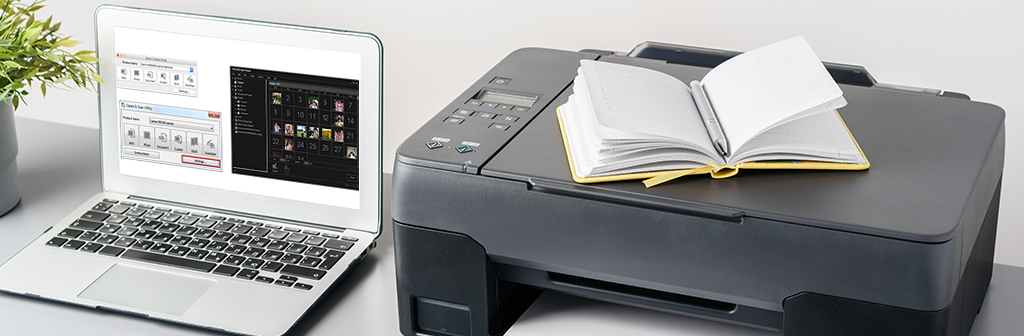
Using the IJ Scan Utility
IJ Scan Utility is Canon’s go-to scanning software for Windows and macOS. It offers a streamlined interface with customizable options for different scan types.
- Open the IJ Scan Utility: Once installed, you’ll find it in your Start menu or Applications folder. Launch the program.
- Select a Scan Type: You’ll see options like “Auto,” “Document,” “Photo,” and “Custom. Auto” detects the type of item you’re scanning, while “Document” and “Photo” allow for more specific settings.
- Adjust Scan Settings (Optional): Click the settings icon to tweak resolution (DPI), file format (PDF, JPEG, etc.), and save location. For standard documents, 300 DPI in PDF format is typically sufficient.
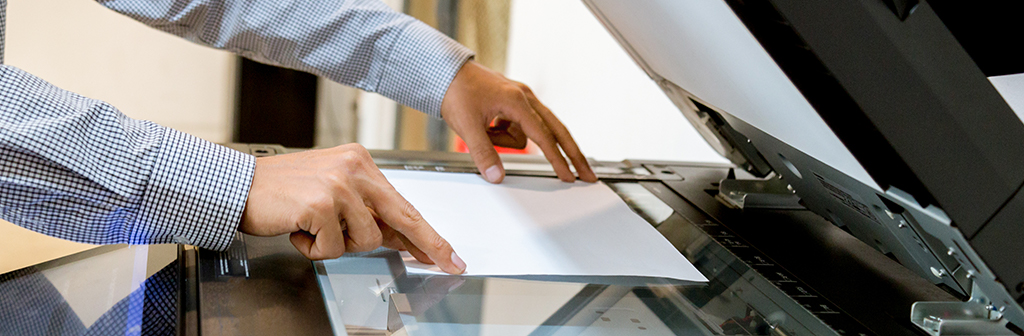
- Place Your Document on the Scanner: Open the scanner lid, position your document face down on the glass, and close the lid gently.
- Click Scan: The utility will initiate the scan, and once completed, the file will be saved in the location you selected—usually your Pictures or Documents folder.
Tip: If you want to scan multiple pages into one PDF file, be sure to check “Save all pages as one file” in the settings. With just a few clicks, you can get a clear digital version of your document or photo, ready for use at any time.
Using My Image Garden
If you prefer a more intuitive experience, My Image Garden is Canon’s photo and document management software that includes scanning capabilities. It’s particularly good for organizing photos, but it also works well for basic document scanning.
To scan using My Image Garden:
- Launch the Program: Open My Image Garden from your computer.
- Go to the Scan Tab: Navigate to the Scan tab on the home screen. You’ll see options like “Photo Scan” or “Document Scan.”
- Choose the Scan Type and Settings: Select your preferred scan mode, and adjust settings such as resolution or color format.
- Start the Scan: Place your document and click “Scan.” Your file will appear in the image library, organized by date and type.
Although My Image Garden isn’t as fast as IJ Scan Utility for batch document processing, it’s great for individual scans, such as photos or school assignments.
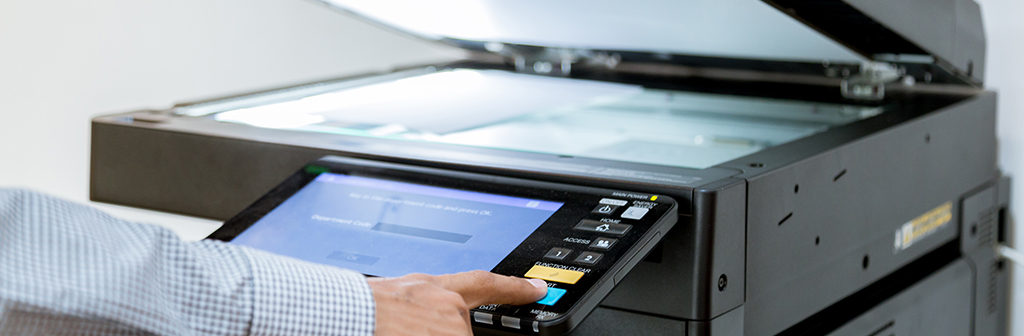
Using the Printer’s Control Panel (Without a Computer)
For fast, instant scanning, many Canon PIXMA models allow you to scan directly from the LCD screen built into the printer. This is a great option if your printer is connected to a computer, USB drive, or cloud service.
Here’s how to scan directly from the printer:
- Turn on the Printer and Load the Document: Place your paper face down on the scanner glass or in the document feeder.
- Navigate the Menu: Use the control panel to select “Scan.” You may see options like “Scan” to “Computer,” “USB,” “Email,” or “Cloud.”
- Choose Your Destination: If scanning to a PC, ensure the correct computer is selected from the list (if multiple are connected).
- Adjust Scan Settings (if available): Some models allow you to modify resolution or file format directly from the panel.
- Press Start: The scan will begin, and your file will be saved based on your destination choice.
This method is particularly convenient when you are working without a main computer or want to scan directly to a USB drive.
Scanning from a Mobile Device
In this increasingly mobile world, being able to scan with your phone or tablet can be a game changer. Canon’s Canon PRINT Inkjet/SELPHY app makes scanning a breeze.
To scan from your phone:
- Download the Canon PRINT App: Available on both Android and iOS, search for “Canon PRINT Inkjet/SELPHY” in your app store.
- Connect Your Printer: Ensure both your phone and printer are connected to the same Wi-Fi network. The app should automatically detect the printer.
- Initiate the Scan: Open the app, tap on the “Scan“ option, and follow the on-screen prompts.
- Save and Share: You can save the scanned file to your device or cloud storage, email it, or share it via messaging apps.
This mobile-friendly approach is perfect for busy professionals and students who need flexibility and speed.
Troubleshooting Common Issues
Here are some common scanning problems and how to solve them:
- Printer not recognized: Ensure your computer and printer are on the same network. Reinstall drivers if needed.
- Scan Utility won’t open: Restart your computer or reinstall the software. Also check for system compatibility updates.
- Blurry or incomplete scans: Clean the scanner glass and adjust document placement. Use higher resolution settings for detailed images.
- Multi-page scan not working: Make sure “Combine into single PDF” is selected in your scan settings.
If these steps don’t solve your problem, visit Canon’s official support page or contact customer service for advanced help.
Tips for Better Scanning
Want professional-looking results every time? Try these expert tips:
- Clean the Scanner Glass: A quick wipe with a microfiber cloth removes dust and fingerprints that can ruin a scan.
- Choose the Right Resolution:
- 300 DPI for text documents
- 600+ DPI for photos or artwork
- Pick the Best File Format:
- PDF for multi-page or business documents
- JPEG or PNG for images and single pages
- Organize Your Files:
Use folders and naming conventions to make your scans easy to find later.
Conclusion
Scanning with a Canon PIXMA printer is easy. Whether you use the powerful IJ Scan Utility, the image-focused My Image Garden, the printer’s built-in screen, or the convenience of your smartphone, there’s a printer that’ll suit your workflow. With a little setup and practice, scanning will become a breeze.
Keep Exploring: More Blogs to Dive Into