How to Resize Photos for Printing
Printing photos is a great way to preserve memories, create artwork, or display professional photography. However, resizing photos for printing can be challenging if you’re not familiar with the process. This guide will walk you through everything you need to know to resize photos for printing effectively.
In a rush? Click the link below to jump straight to the step-by-step guide.
- Resize Photos for Printing on Windows/Mac with Built-in Tools
- Resize Photos for Printing on iPhone/iPad
- Resize Photos for Printing with Third-Party Tools
Why Resizing Matters
When printing a photo, the size of the image and its resolution directly affect the quality of the print. An image that looks sharp on your screen might appear blurry or pixelated when printed if not resized properly. Understanding the relationship between image resolution, dimensions, and print size is essential to achieve high-quality prints.
Key Concepts to Understand
Resolution and DPI
Resolution is measured in pixels, while DPI (dots per inch) refers to how many dots of ink are printed per inch. For high-quality prints, a resolution of 300 DPI is typically recommended. For example, an image that is 3000 pixels wide and 2400 pixels tall will print at 10 inches by 8 inches at 300 DPI.
Aspect Ratio
The aspect ratio is the ratio of an image’s width to its height. Maintaining the correct aspect ratio when resizing is crucial to avoid distortion.
File Format
High-resolution formats like TIFF, PNG, or JPEG (with minimal compression) are ideal for printing. It’s always good to start with the highest quality image.
Tools for Resizing Photos
To resize photos effectively, you can use a variety of tools. Popular options include Image Resizer, Adobe Photoshop, GIMP, Preview (Mac), Canva, and Pixlr.
How to Resize Photos for Printing on Windows/Mac (with Built-in Tools)
1. Windows Photos
- Open your image in Windows Photos.
- Click on “Edit & Create.”
- Select “Resize” from the dropdown menu.
- Choose a preset size or “Custom Size.”
- Click “Apply” and then “Save a Copy.”
2. Mac Preview
- Open the image in Preview.
- Go to “Tools” > “Adjust Size.”
- Enter the new pixel count in “Width” or “Height.”
- Ensure “Scale Proportionally” is ticked.
- Click “OK” and save the image.
3. HP Smart (Windows)
- Use Scan > Preset = Photo > Import photo > Edit > Crop > Save.
- Adjust printed photo size with Photo Size presets.
How to Resize a Photo for Printing on iPhone/iPad
Resizing a photo on iPhone or iPad is straightforward with the built-in app. However, if you want to set custom dimensions, you need to use third-party tools. Following these steps to enlarge an image or make it smaller.
- Open the Photos App: Select the image you want to resize.
- Edit the Image: Tap on “Edit” at the top right corner.
- Crop/Resize: Tap on the crop icon to adjust the size manually or use third-party apps like “Image Size” to set custom dimensions.
- Set DPI: If you’re using a third-party app, ensure you set the DPI (300 DPI is ideal for printing).
- Save: Save the resized image to your library or print directly from the app.
Popular Third-Party Tools to Resize Photos for Printing
If you need more advanced features or customization, here are a few popular tools to help you resize photos effectively:
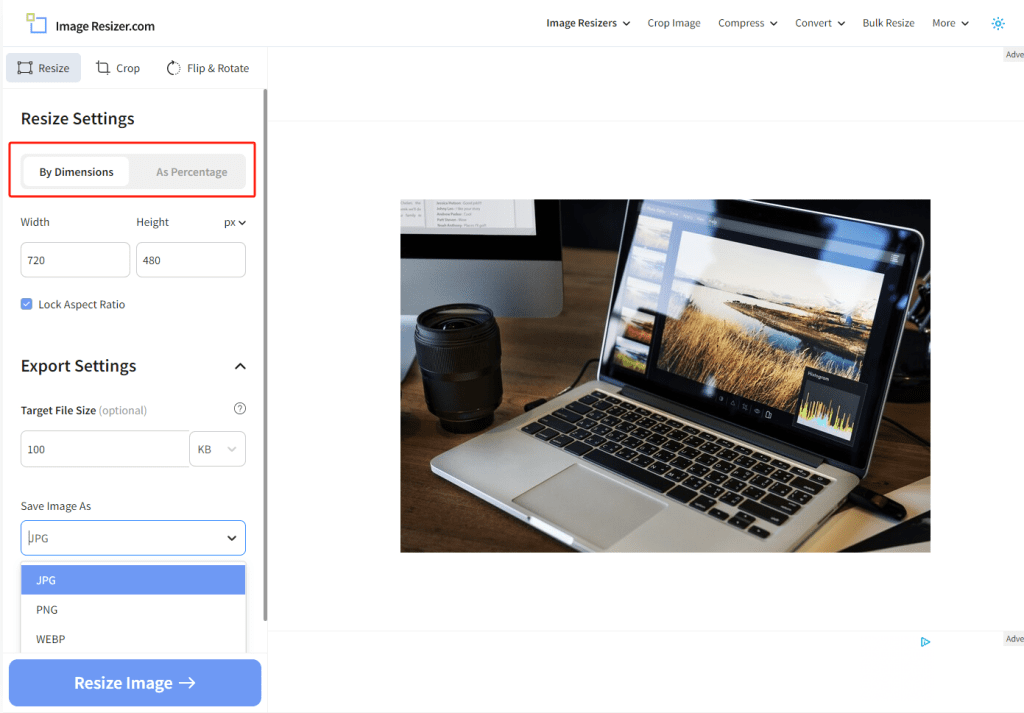
1. Image Resizer
Image Resizer is a free, easy-to-use online tool for resizing photos before printing.
- Navigate to imageresizer.com and open an image.
- Adjust the size by dimensions or by percentage.
- Set target file size and select the file format.
- Click Resize Image, then download the image.
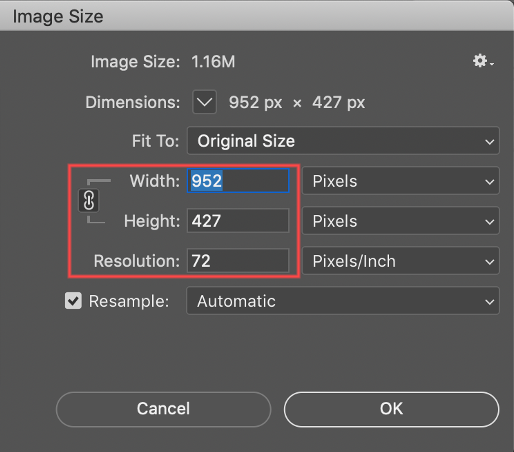
2. Adobe Photoshop
- Open the image in Photoshop.
- Go to Image > Image Size.
- In the dialog box, set the Resolution (300 DPI for printing).
- Adjust the Width and Height in pixels.
- Click OK and save the image.
3. GIMP
- Open the image in GIMP.
- Go to Image > Scale Image.
- Set the Resolution to 300 DPI.
- Adjust the Width and Height.
- Click Scale, then save the image.
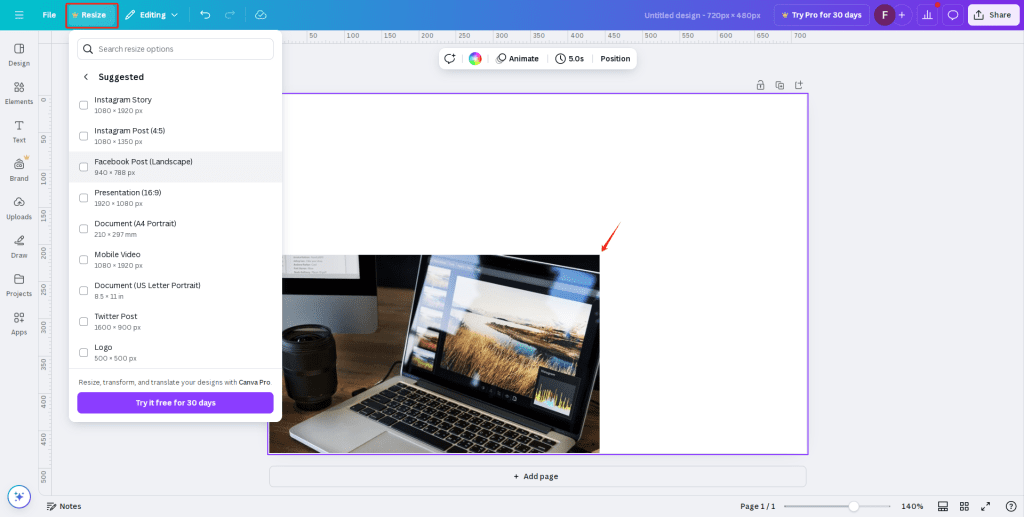
4. Canva
- Upload the image to Canva.
- Click on the image and resize it by dragging the corners or adjusting the dimensions under Resize.
- Download the image in a high-quality format such as PNG or JPEG.
5. Pixlr
- Open Pixlr in your browser and upload your photo.
- Go to Image > Image Size.
- Set the Width and Height, ensuring you maintain the aspect ratio.
- Download the resized image.
6. Paint (Windows)
- Open the image in Paint.
- Go to Resize in the toolbar.
- Adjust by percentage or pixels.
- Click OK and save the image.
Tips for High-Quality Prints
Start with a High-Resolution Image: A larger original image allows more flexibility when resizing.
- Use the Correct DPI: 300 DPI is the standard for high-quality prints.
- Avoid Over-Resizing: Enlarging an image too much can result in pixelation.
- Sharpen the Image if Needed: After resizing, a slight sharpening can enhance details.
- Soft Proof Your Image: Use your software’s soft proofing feature to simulate how the image will look when printed.
Common Print Sizes and Resolutions
Here are some common print sizes and the required resolution for high-quality prints:
- 4×6 inches: 1200×1800 pixels
- 5×7 inches: 1500×2100 pixels
- 8×10 inches: 2400×3000 pixels
- 11×14 inches: 3300×4200 pixels
- 16×20 inches: 4800×6000 pixels
Troubleshooting Common Issues
Blurry Prints: Check if the image resolution is too low.
Distorted Images: Ensure the aspect ratio was maintained during resizing.
Color Mismatch: Calibrate your monitor and use the correct color profile for printing.
Conclusion
Resizing photos for printing is essential to achieve the best possible quality. By understanding key concepts like resolution, DPI, and aspect ratio, and using the right tools and techniques, you can ensure your printed photos look sharp, vibrant, and professional. Follow these steps, and you’ll be well on your way to creating stunning prints from your digital images.
Frequently Asked Questions about Resizing Photos for Printing
Why do I need to resize photos for printing?
Resizing ensures that the image fits the desired print dimensions without distortion or loss of quality. It also helps maintain the proper resolution for sharp, clear printing.
What is the best resolution for printing photos?
In general, a resolution of 300 DPI (dots per inch) is recommended for high quality prints. Lower resolutions may appear pixelated when printing.
How do I calculate the image size needed for printing?
Multiply the desired print dimensions (in inches) by the DPI. For example, a 10 x 8 inch print at 300 DPI requires a 3000 x 2400 pixel image.
What happens if my image has a lower resolution than required?
If the resolution is too low, the image may appear blurred or pixelated. You can try scaling up with AI-based tools, but excessive enlargement may reduce the quality.
What software can I use to resize images for printing?
Popular tools include:
- Adobe Photoshop
- GIMP (free alternative)
- Lightroom
Online tools such as Canva, Image Resizer, or ResizePixel
Should I keep the aspect ratio when resizing?
Yes, keeping the aspect ratio prevents image distortion. If the print size has a different aspect ratio than the original photo, you may need to crop it.
What file format should I use for printing?
TIFF and PNG are preferred for high quality prints due to lossless compression. JPEG is also acceptable, but may lose some quality due to compression.
Can I enlarge a small photo without losing quality?
Some AI tools can scale images with minimal loss of quality, but enlarging beyond the original resolution usually reduces sharpness.
Does resizing affect the file size?
Yes, increasing the resolution or dimensions increases the file size, while decreasing them decreases the file size.
How can I ensure the best print quality?
- Use high resolution images
- Resize images correctly to match the print dimensions
- Save them in a lossless format such as TIFF
- Choose a professional printing service for best results