
Printing a picture directly from iPhone is a convenient way to get high-quality prints for albums, scrapbooks, or projects. But sometimes the default print size is too large, and you may need to adjust it to print at a smaller size. This guide shows you how to print a picture smaller on iPhone through various methods, including adjusting printer settings, cropping photos, or using third-party apps.
Index:
Method 1: Adjust Printer Settings
Method 2: Crop Photos Using the iPhone Photos App
Method 3: Use Third-Party Apps to Resize Images
Affordable Ink Cartridges for High-Quality Photo Printing
Conclusion
Method 1: Adjust Printer Settings
Some printers allow you to scale an image before printing. You can adjust the settings using the iPhone's built-in printing features, or you can use the printer manufacturer's apps, such as HP Smart, Epson iPrint, or Canon PRINT, to resize your images more accurately.
1.1 Adjust Image Size via iPhone's Built-in Print Function
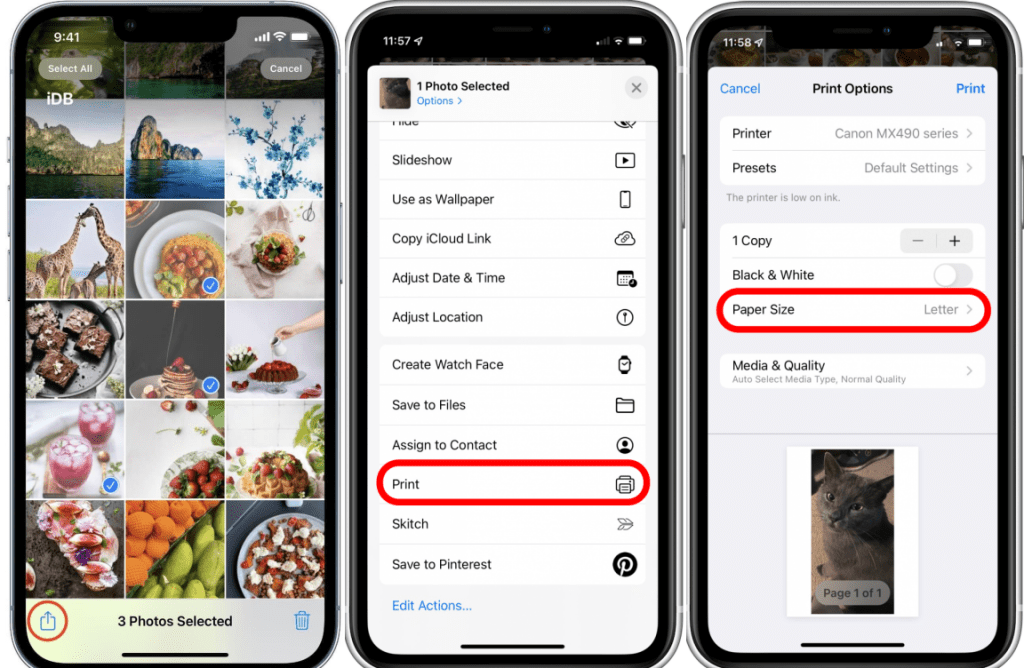
- Open the Photos app and select the image you want to print.
- Tap the Share button (a square with an upward arrow).
- Select Print from the options.
- Choose an AirPrint-compatible printer (ensure your printer and iPhone are connected to the same Wi-Fi network).
- Tap Paper Size and choose a smaller size (e.g., 4x6 or 5x7) to reduce the printed image dimensions.
- Preview the image, then tap Print to complete the process.
1.2 Resize Images Using Printer Manufacturer Apps
If your printer does not support scaling via AirPrint, you can use the official printer app to control image size better.
(1) HP Smart (for HP printers)
- Download HP Smart from the App Store and install it.
- Open the app and connect your HP printer.
- Tap Print Photos and select an image.
- In the print preview screen, tap Edit, then:
- Select Resize and choose Fit to Page, Fill Page, or manually set a custom scale percentage (e.g., 50%).
- Review the changes, then tap Print.
(2) Epson iPrint (for Epson printers)
- Download Epson iPrint from the App Store and install it.
- Open the app and connect your Epson printer.
- Tap Print Photos, then select your image.
- In the print settings:
- Choose the Paper Size (e.g., 4x6, 5x7).
- Enable the Scaling option and manually set a percentage (e.g., 60%).
- Adjust the Margin Settings if needed.
- Tap Print after confirming the changes.
(3) Canon PRINT (for Canon printers)
- Download and open Canon PRINT, and then connect your Canon printer.
- Tap Photo Print and select your image.
- In the preview screen, tap the Crop icon or use Pinch-To-Zoom to adjust the size of the image.
- Or tap Print Setting to choose a desired paper size.
- Tap Print to finalize the process.
Method 2: Crop Photos Using the iPhone Photos App
If your printer cannot resize an image, cropping the picture is another way to reduce the print size. However, this method may delete part of the image.
Steps:
- Open the Photos app and select the image.
- Tap the Edit icon.
- Select the Crop & Rotate tool (square crop icon).
- Adjust the crop box:
- Drag the edges inward to make the image smaller.
- Tap Aspect Ratio (top right) and select standard sizes like 4:6 or 5:7.
- Tap Done to save the cropped image.
- Print the image using Method 1.
Limitations:
- Some parts of the image will be removed.
- Adjustment of resolution is not supported.
Method 3: Use Third-Party Apps to Resize Images
If you need precise control over image dimensions (for example, adjusting pixels or DPI), third-party applications can help.
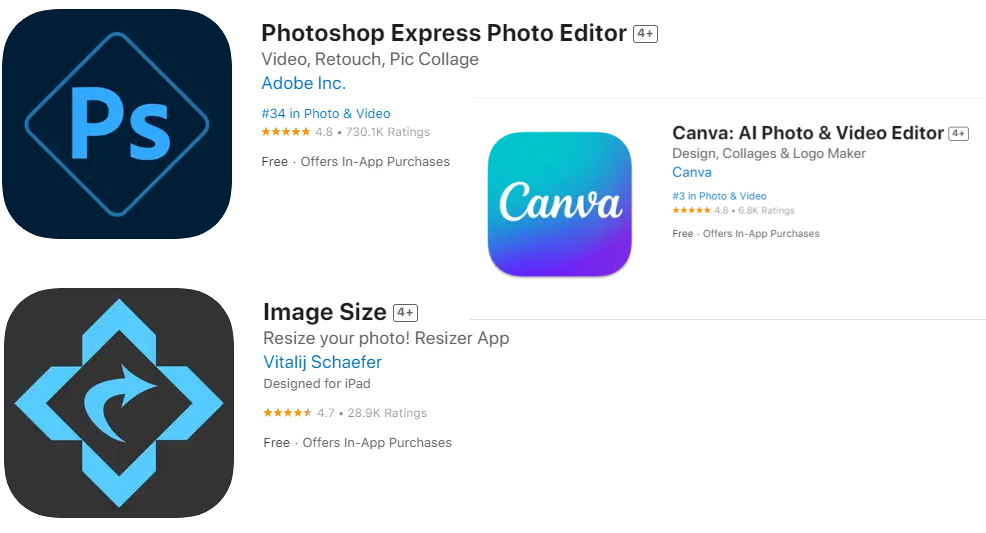
1. Photoshop Express (Best for Advanced Editing)
- Download Photoshop Express from the App Store.
- Open the app and import your image.
- Tap Resize and manually enter the width and height (e.g., 800x600 pixels).
- Save the resized image and print it using Method 1.
2. Image Size (Simple and User-Friendly)
- Download the Image Size from the App Store.
- Open the app and tap Photo Library to select an image.
- Enter the desired width and height (in pixels, millimeters, or inches).
- Set the DPI (300 DPI is ideal for high-quality printing).
- Save the resized image and print it.
3. Canva (Best for Layout Adjustments and Collages)
- Download Canva from the App Store.
- Open the app and tap Create a Design.
- Set a custom image size (e.g., 500x500 pixels).
- Upload and adjust the image within the frame.
- Save and print the resized image.
Affordable Ink Cartridges for High-Quality Photo Printing
To print high quality images, it is vital to use reliable ink cartridges. Original ink cartridges will no doubt meet your requirements in terms of quality and performance, but they don't always come at the price you'd like. For crisp, colorful images at an affordable price, try YB Toner's compatible ink cartridges. Our cartridges are built for reliable printing and consistently output true-to-life colors.
Conclusion
With the Photo app that comes with your iPhone, you can simply resize your pictures to make them smaller. If you need the exact size, you can also do it through third-party apps. Whatever your needs, these methods can help you print satisfying photos from your iPhone.
FAQs About How to Make a Photo Smaller on iPhone for Printing
Why can't I resize my photo on my iPhone?
Some printers don't support zoom feature for AirPrint, so you may not be able to resize the photo directly on your iPhone. You can try cropping your photos or using a third-party app to resize.
Why are my printed photos cropped?
If your printer auto-fills the page, it may crop the edges of the picture. It is recommended to select “Fit to Page” in the print settings or perform manual cropping to ensure that key content is not truncated.
How can I avoid blurring of my printed photos?
Here are three tips to avoid blurry printed photos:
- Make sure the image resolution is high enough (at least 300 DPI).
- Use Photoshop Express or Image Size App to manually adjust the resolution.
- Choose high-quality print paper and ink cartridges, such as YB Toner compatible cartridges, for sharper output.
Can I print my photo ID directly from my iPhone?
Yes, it is recommended to use Canva or Photoshop Express to set the specific size (e.g. 2×2 inches) and make sure the DPI is set to 300 for sharpness.
Why can't the printer print iPhone photos?
There are three reasons why the printer cannot print iPhone photos:
- The iPhone and the printer are not on the same Wi-Fi network.
- The printer does not support AirPrint (we recommend downloading the brand's official app for printing).
- The photo format is not supported (JPG or PNG is recommended).
Why are the printed photos larger than the preview?
Your printer may have "Full Page" mode enabled by default, which will automatically enlarge the image. You can select "Fit to Page" in the print settings. Or the paper size may be different from the size you set on your iPhone, check to make sure they match.
Will photos printed directly from the iPhone affect the image quality?
No. iPhone uses high-resolution images, so as long as your printer supports high DPI (300 DPI and above), the print quality will not be affected. If you need higher quality, we recommend using Photoshop Express or Image Size to adjust the resolution.
How can I avoid white edges when printing photos?
- Make sure the photo ratio matches the paper size (e.g. 4×6, 5×7).
- Use a printer app (e.g. HP Smart, Epson iPrint) to adjust the margin settings.
Do compatible cartridges affect print quality?
No! As long as you choose high-quality compatible cartridges, such as YB Toner compatible cartridges, they can provide comparable color and detail to original cartridges at a much better price.


