How to Fix a Paper Jam in a Canon Printer?
Paper jams can disrupt even the smoothest printing workflow, leaving us racking our brains to find a solution. Canon printer paper jams are a common problem that can be solved with a few simple steps. In this blog, we’ll walk you through clearing a Canon printer paper jam.
What Is a Paper Jam in a Canon Printer?
A paper jam occurs when the paper gets stuck within the printer’s internal mechanisms and cannot move through the printing path. In Canon printers, paper jams are most often caused by factors like overfilled trays, damaged or curled paper, incorrect paper sizes, or even dust build-up on the printer’s rollers.
You’ll typically know you have a jam when the printer stops in the middle of a job and flashes an error message on its display, usually reading something like “Paper Jam” or “Paper Feed Error.” To avoid further complications, it’s essential to approach the jam carefully and clear it correctly.
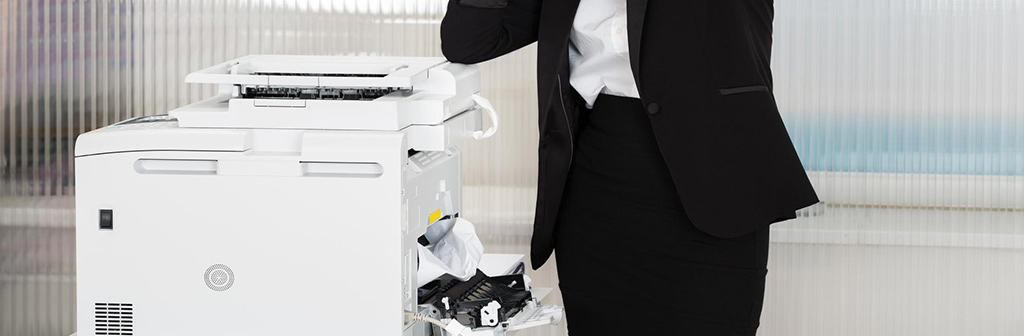
Preparing to Clear the Jam Safely
Before you begin, it’s worth taking some basic safety precautions.
Turn off the printer and unplug it from the power source. This ensures that no moving parts are activated when dealing with a paper jam.
Get the necessary tools ready. You may need to use a flashlight to peer into dark corners, tweezers to remove small paper fragments, and a soft cloth to remove dust.
How to Fix a Paper Jam in a Canon Printer?
When it comes to fixing a paper jam in a Canon printer, following a step-by-step approach can help you safely remove the jammed paper and prevent further issues.
1. Access the Rear Cover (for Most Canon Printers)
For many Canon printers, accessing the rear cover is one of the first steps in removing a jam.
- Locate the rear cover: This is typically found at the back of the printer. Carefully open it by pressing the release latch or button.
- Look for jammed paper: Shine your flashlight to see if there’s any paper stuck in the paper path.
- Remove the paper gently: If you see paper, pull it out slowly in the direction of the paper path to avoid tearing it.
- Close the rear cover: Once the paper is out, firmly close the cover.
2. Check the Paper Feed Tray
If you didn’t find paper in the rear cover area, the jam could be located in the paper feed tray.
- Inspect the paper tray area: Pull the tray out and look inside for any visible pieces of paper.
- Remove stuck paper carefully: If there’s paper here, gently pull it out without letting it tear.
- Clear any small fragments: Sometimes, small pieces can be left behind in the feed tray. Use tweezers to extract them if necessary.
- Reinsert the paper tray: Once cleared, slide the tray back into place securely.
3. Inspect the Output Tray and Fuser Area
The output tray and fuser area can sometimes trap paper, especially if the jam happens as the paper exits.
- Open the top or output tray cover: Most Canon printers have a top panel or cover that provides access to the fuser and output rollers.
- Look for jammed paper: Carefully inspect this area and remove any paper, following the direction of the paper feed to avoid tearing.
- Close the cover securely: Ensure that all doors and covers are closed properly to avoid further issues.
4. Gently Remove the Paper Without Tearing It:
When dealing with a paper jam, avoid pulling it hard. Instead, firmly grasp the paper on both sides and slowly apply steady pressure. If the paper starts to tear, pause and try to grasp it from another angle. Small paper fragments can be difficult to find and may cause further problems if left in.

Canon Printer Says Paper Jam but No Paper in It
In some instances, a Canon printer may display a “Paper Jam” message even when no paper is visible in the paper path. This can be frustrating but is often due to residual fragments, dust, or a misaligned sensor.
- Check for small pieces of paper: There could be tiny remnants from a previous jam. Use a flashlight to look closely in the feed area and remove any small bits.
- Clean the paper path and sensors: Dust can accumulate on the sensors, causing the printer to misinterpret a jam. Use a lint-free cloth to wipe down the rollers and accessible sensors.
- Restart or reset the printer: Sometimes, a quick reset can solve the issue. Unplug the printer for a few minutes, then plug it back in and power it on.
- Update firmware: Canon periodically releases firmware updates that can fix bugs like false paper jam errors. Check Canon’s website for any updates compatible with your printer model.
Resetting the Printer After a Paper Jam
Once the jammed paper has been removed, it’s essential to reset the printer to ensure it functions correctly. This process can help clear any lingering error messages or internal faults.
- Plug in and power on: After clearing the jam and checking for fragments, plug the printer back in and turn it on.
- Perform a test print: This allows you to confirm that the paper path is now clear and that the printer is functioning normally.
- Listen and observe: Pay attention to any unusual sounds or error messages that might indicate leftover debris or other issues.
If the printer operates smoothly and no error messages appear, you’re all set. However, if the problem persists, you may need to perform some preventative maintenance. Read the blog How to Reset Canon Printer to learn more.

Preventing Future Paper Jams
To keep your Canon printer operating smoothly, it’s essential to maintain it and follow best practices when loading paper. Here are some tips:
- Avoid overfilling the paper tray: Overloading can cause sheets to get stuck or feed incorrectly. Fill the tray only to the recommended level.
- Use the correct paper size and type: Canon printers are designed to handle specific paper types. Refer to your printer’s manual for the best options and make sure to adjust the tray guides accordingly.
- Keep your printer clean: Dust and debris buildup can interfere with the rollers. Regularly wipe down the tray and roller area with a soft cloth.
- Store paper properly: Humidity can cause paper to curl or stick, increasing the likelihood of a jam. Store paper in a cool, dry place to maintain its quality.
Taking these preventive measures can significantly reduce the chances of encountering paper jams in the future.
Seek Professional Help
While many paper jams can be cleared with the above steps, there are times when it’s best to consult a professional. If you experience recurring paper jams or if the jammed paper seems impossible to reach without disassembling the printer, it may be wise to seek technical assistance. Additionally, any noises that suggest a mechanical issue (such as grinding or clicking sounds) should be looked into by a Canon-certified technician.
Professional help can save you time and ensure that the printer remains in good condition, especially if it’s a higher-end model with complex internal mechanisms.
Conclusion
Dealing with a paper jam in your Canon printer doesn’t have to be a difficult task. By following the steps outlined in this guide, you can quickly and safely clear most paper jams and get your printer back up and running. If the problem persists, professional help is always the best option.
Related reading: