How to Print on Needlepoint Canvas?
Unlike hand-drawing a pattern on canvas with a marker (which can be time-consuming and imprecise), printing offers an easier and more accurate way to create a pattern. This is especially useful for complex projects that require multiple copies of the same pattern. Whether you are designing a unique pattern or duplicating an existing design, there are several ways to create a pattern quickly. In this blog, we will explore three methods of how to print on needlepoint canvas, as well as their pros and cons.
Quick Summary: Three Ways to Print
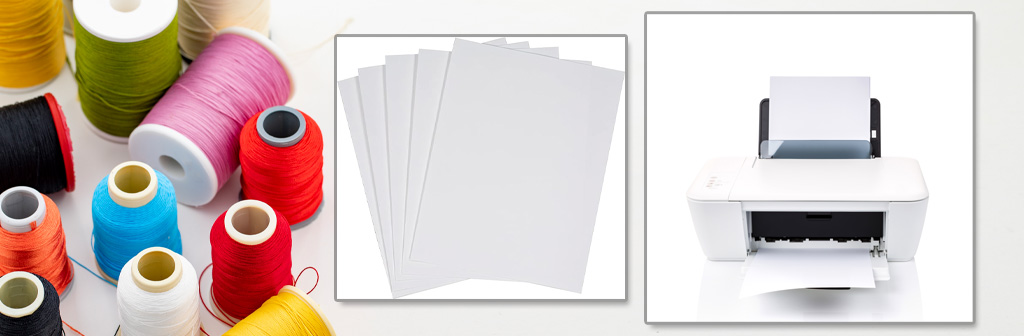
There are three ways to print on needlepoint canvas: iron-on transfer paper, printable fabric sheets, and direct printing. Each method has its pros and cons, and we’ve provided a quick comparison to help you choose the best option.
| Method | Equipment Needed | Pros | Cons | Best For |
| Printing with Iron-On Transfer Paper | Iron-on transfer paper, regular inkjet or laser printer, needlepoint canvas, scissors, iron | ✅ Produces clear, detailed images ✅ Suitable for large canvases ✅ Good for text and complex designs | Requires an iron; Can make the canvas stiff; May fade over time | Fast & easy for beginners; Large, complex designs requiring high detail |
| Printing with Printable Fabric Sheets | Printable fabric sheets, inkjet printer, scissors, needlepoint canvas, adhesive spray or fabric glue | ✅ Produces vibrant, high-quality prints ✅ More flexible and durable than transfer paper ✅ Allows repositioning before final adhesion | Requires adhesive or stitching; Alters fabric texture; More expensive than other methods | For soft, fabric-based printing; Those who want high-quality prints with flexibility |
| Direct Printing on Canvas | Pigment-based inkjet printer (Epson EcoTank Pro, Epson SureColor, Canon PRO), lightweight needlepoint canvas, adhesive spray or masking tape, a sheet of plain paper or cardstock | ✅ No extra materials like transfer paper needed ✅ High level of detail ✅ Works well for small and medium-sized projects | Not all printers can print on canvas; Limited by printer size | Small to medium-sized projects with fine details; Users with pigment-based inkjet printers (Epson EcoTank Pro, Epson SureColor, Canon PRO). |
Printing on needlepoint canvas using iron-on transfers is the easiest and most convenient way for beginners. It requires a printer, iron, and transfer paper. This method produces clear, detailed images and is ideal for large designs, but it causes the canvas to become stiff and fade over time.
In contrast, printing with printable fabric sheets is more flexible. They allow for repositioning before final bonding but require adhesives or stitching, which may slightly change the fabric texture and increase costs.
In addition, printing directly on canvas is ideal for small to medium-sized projects. This method requires a pigment-based inkjet printer and a certain amount of skill. However, not all printers can handle canvas, and the size of the printer limits it.
Overall, which method you choose to print on needlepoint canvas depends on your usage habits and desired results. The first method is ideal for beginners, while direct printing is suitable for experienced users. The second method strikes a balance between quality and ease of use. Additionally, if you want to print large, complex designs, we recommend using the first method. For those seeking high-quality prints with flexibility, choose the second method. If you are printing small to medium-sized projects with intricate details, print them directly.
How to Print on Needlepoint Canvas?
Note: It is recommended to confirm your printer compatibility before printing on needlepoint canvas.
1. Printing on Needlepoint Canvas Using Iron-On Transfer Paper
Iron-on transfer is an excellent option for those who want a high-quality image on canvas without the laborious process of hand-tracing. It is the easiest and most convenient for beginners with no experience. This method works well for larger needlepoint canvases and produces a crisp, detailed image. However, due to the heat involved in the process, it can sometimes cause the canvas to become stiff. Also, some transfer papers may fade over time.
What You Need:
- Iron-on transfer paper
- Inkjet or laser printer
- Needlepoint canvas
- Scissors
- Iron (without steam function)
① Prepare Your Design
Use software like Photoshop, Canva, or even Microsoft Word to create your design. Once your design is complete, mirror it so that the final design will appear correctly when transferred.
② Print the Design
Load the iron-on transfer paper into your printer with the correct side facing up. Set the print quality to “Best” for the best printing results. After that, wait for the ink on your print to dry completely.
③ Cut and Position
Trim the printed design close to the edges. Place the needlepoint canvas on a heat-resistant surface such as a work table. Then, place the iron-on transfer paper face down on the canvas.
④ Heat
Preheat your iron to the recommended setting (usually high, but not steam). Then, press the iron over the entire paper for 30-60 seconds, applying even pressure. Be careful not to move the iron too much, as this may cause the design to shift or blur.
⑤ Peel off the Paper
Wait for the transfer paper to cool slightly, and then peel it off. If the image did not transfer completely, reheat those areas. Finally, let the printed canvas sit for a few minutes.
✅ Pros:
- Produces Clear and Detailed Images: Iron-on transfer paper allows you to transfer high-resolution images to a needlepoint canvas.
- Suitable for Larger Needlepoint Canvases: Unlike direct printing, which is usually limited by printer size, iron-on transfers can be applied to larger canvases. You can transfer multiple times to create a design without worrying about loading them into the printer.
- Good for Transferring Text and Complex Designs: If your design includes text, shading, or multiple colors, this transfer preserves every detail.
❌ Cons:
- Requires an Iron: This may be difficult for users who don’t have this product. In addition, if the iron is too hot or moved unevenly, some content may not transfer correctly, resulting in missing or deformed details.
- May Cause Stiffness in the Canvas: The transferred design forms a thin plastic layer on the needlepoint canvas. You may feel that the surface of the needlepoint canvas is slightly stiffer, which will affect the texture of the fabric and make stitching more challenging.
- Some Transfer Papers May Fade Over Time: Depending on the quality of the iron-on transfer and the type of ink used, the design may fade after prolonged exposure to light or washing.
2. Printing on Needlepoint Canvas Using Printable Fabric Sheets
Printing with printable fabric sheets offers a compromise solution for those who want the flexibility of high-quality printing but don’t want to deal with ironing or direct printing. The printable fabric sheets are fabric-based but designed to run through a printer like regular paper, absorbing ink effectively to produce sharp, colorful images. However, this method requires additional adhesives or stitching and tends to cost more than the other two methods due to the sheets.
What You Need:
- Printable fabric sheets
- Inkjet printer
- Scissors
- Needlepoint canvas
- Adhesive spray or fabric glue
① Print Your Pattern
Place the printable fabric sheet in your inkjet printer, fabric side up. Then, check the printer settings and select the highest quality to print. If your design includes text, make sure the text is aligned and scaled to fit your needlepoint canvas.
② Let the Print Dry
Wait 10-15 minutes for the design to dry. Do not touch the printed surface too soon, as the ink may still be wet.
③ Cut and Paste
Use scissors to trim the printed fabric sheet to size, then glue it to the canvas and press firmly to secure it. If you are working with a large design, cut it into several sections for easier handling. To adhere to the fabric pieces, use spray adhesive, double-sided tape, or fabric glue.
④ Seal If Necessary
Depending on the type of fabric sheet, some designs may require fabric sealant to prevent fading. If your sheet recommends heat-setting, gently iron the surface with low heat (without steam) to further bond the ink. This will help maintain the print’s vibrancy and prevent early wear.
⑤ Prepare for Stitching
Before you begin your needlepoint work, make sure the printed fabric is wholly glued. If necessary, sew around the edges to keep it secure. After that, you can start stitching on the printed design.
✅ Pros:
- Produces Vibrant, High-Quality Prints: Printable fabric sheets absorb ink quickly to produce sharp, colorful designs. Fabric sheets retain a more natural texture than iron-on transfer prints, which sometimes make a plastic-like surface.
- More Flexible and Durable Than Transfer Paper: Unlike iron-on transfers, which produce a stiff surface, printable fabric sheets maintain the fabric’s natural flexibility. This makes stitching easier, and the needle can pass smoothly through the canvas without resistance.
- Can Add an Extra Layer to the Canvas: The fabric sheet sits on the surface of the needlepoint canvas rather than being embedded in it. Therefore, we can create an extra layer on top of the fabric sheet to create a richer pattern.
- Easy to Apply and Reposition If Needed: Printable fabric sheets often come with a peel-and-stick backing or can be applied with fabric glue. If you accidentally misplace them, some allow for repositioning before permanent adhesion.
❌ Cons:
- Requires Additional Adhesive or Stitching: Unlike the other two methods, which permanently fuse the pattern to the canvas, printable fabric sheets must be manually attached. These sheets are usually glued with spray adhesive or fabric glue or stitched around the edges.
- The Added Layer Affects the Texture: Since the sheet can create an extra layer, this may slightly change the feel of the fabric, which some may find unsightly. Additionally, it may make sewing more difficult than working on a regular printed canvas.
- Slightly More Expensive Than Other Methods: Printable fabric sheets tend to cost more than other methods. If you’re working on a large project or need multiple sheets, the cost can add up quickly.
3. Print Directly on Needlepoint Canvas
In addition to the above two methods, you can also use an inkjet printer to print directly on the needlepoint canvas. This method does not require additional consumables and is very suitable for small needlepoint canvases. However, this is limited to pigment-based inkjet printers such as Epson EcoTank Pro, Epson SureColor, and Canon PRO. Moreover, direct printing may cause paper jams and ink flow.
Common printers used for this method are: Epson EcoTank ET-3850, Epson EcoTank ET-4850, Epson EcoTank Pro ET-5150, Epson EcoTank Pro ET-5850, Epson WorkForce Pro WF-7820, Epson WorkForce Pro WF-7840, Epson SureColor P600/P800/P900, Canon PIXMA PRO-10, Canon imagePROGRAF PRO-300, HP OfficeJet Pro 9015e/9025e…
What You Need:
- Pigment-based inkjet printer
- Lightweight needlepoint canvas
- Adhesive spray or masking tape
- A sheet of plain paper or cardstock
① Prepare the Canvas
Cut your needlepoint canvas to a standard printer paper size (8.5″ x 11″ or A4 ) to ensure it will fit in your inkjet printer. If the canvas is too flimsy, use a light adhesive spray or masking tape to adhere it to plain paper or cardstock along the edges to reinforce it.
② Set Up the Printer
Next, adjust your printer quality to “High Quality” or “Best Quality” for best results. If your printer allows, choose a paper setting that mimics fabric, such as “Matte Photo Paper” or “Fabric,” which will help the ink adhere to the canvas.
③ Print the Design
Load the canvas into the printer, avoiding any wrinkles. Next, click “Print” to print your design and wait for the ink to dry completely. You can use a hairdryer on low to speed up drying.
④ Protect Your Design
Inkjet printer inks can smudge or fade over time, especially if left in a humid environment. To protect your design, use fabric sealant spray or clear acrylic fixative to lightly spray an even coat over the print area and allow it to dry.
⑤ Check for Any Issues
Finally, check your printed canvas for any misalignment or ink smears. If the ink appears too light, consider reprinting with a higher saturation setting. If the ink is too dark or bleeds, test with a lower ink density. You can usually find this under the “Color” or “Quality” tab with options like “Saturation” or “Color Intensity”. Once this is done, your canvas is ready to use.
✅ Pros:
- No Extra Materials Like Transfer Paper Are Needed: Compared to the other two, this method does not require additional supplies. You simply place the needlepoint canvas into your inkjet printer and print directly.
- Provides a High Level of Detail: Inkjet printers can produce precise lines, making this method ideal for transferring intricate patterns. Also, since the ink is applied directly to the canvas, it won’t cause your design to deform.
- Works Well for Small and Medium-Sized Projects: Direct printing is ideal for smaller canvas sizes, such as standard printer sizes, e.g., 8.5″ x 11″ or A4. If your pattern is compact, this is a quick and efficient way to do it.
❌ Cons:
- Not All Printers Can Handle Canvas Material: Many home printers are not designed to print thick or textured materials like needlepoint canvas. Attempting to print on hard or rough canvas may cause paper jams, ink smearing, or damage to your printer. It is recommended to check your printer specifications before trying this method.
- Limited by the Size Your Printer Can Accommodate: Most home inkjet printers only support standard paper sizes or smaller. Therefore, direct printing may only be suitable for small to medium-sized canvases. If you need to print a larger design, you may need to break it into several parts or look for a professional printer with large-format capabilities.
Wrap It Up
Printing on needlepoint canvas is a great way to save time and ensure your designs are precise. Whether you prefer iron-on transfers, direct printing, or printing on printable fabric sheets, there is a method that will work for you. It all depends on your experience and printing needs.
Other Blogs You May Be Interested In: