How to Adjust Print Density on HP Printer
Many times we need to adjust the page print density to meet our printing needs, such as printing on notebook paper. So, in this blog, we will tell you what print density is and guide you step by step on how to adjust print darkness on your HP printer.
What is Print Density?
Print density refers to the darkness or amount of ink/toner coverage on a printed page. It is determined by the number of dots or pixels per inch (DPI or PPI) used to create the printed image. The higher the DPI or PPI, the more ink/toner is used, resulting in a denser print. Print density affects the readability of text and image quality in printed materials. It is usually adjusted in the print settings to achieve the level of darkness and clarity required for the intended use of the printed material.

When Do We Need to Adjust the Print Density?
Depending on specific printing requirements, it may be necessary to adjust the print density in various cases. Some common reasons for adjusting print density include:
Legibility
When printing text, it should be clear and easy to read. If the print density is too light, the text may be difficult to read. On the other hand, if the print density is too dark, it may cause the text to bleed or appear blurred, which also affects readability. Adjusting the print density helps achieve the proper darkness level for optimal legibility.
Picture Quality
When printing images, it is important to achieve the correct level of contrast and detail. If the print density is too light, the image may be washed out or lack detail. If the print density is too dark, the image may become oversaturated, causing colors to bleed or appear unnatural. Adjusting the print density can help achieve the desired image quality.
Printing Cost
Print density also affects printing cost. High density printing may cause printer to consume more ink/toner, resulting in higher printing costs. Adjusting print density can help reduce printing costs.
In summary, print density should be adjusted to achieve the desired level of legibility, picture quality, and printing cost.
How to Adjust Print Density on HP Printer?
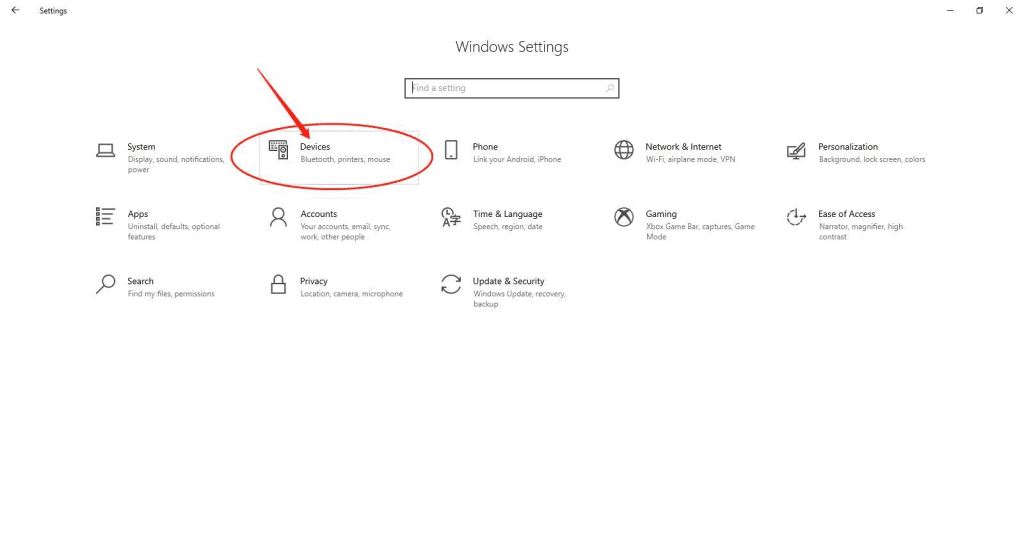
1. At Windows Start Menu, click “Settings” to find “Devices” and click on it.
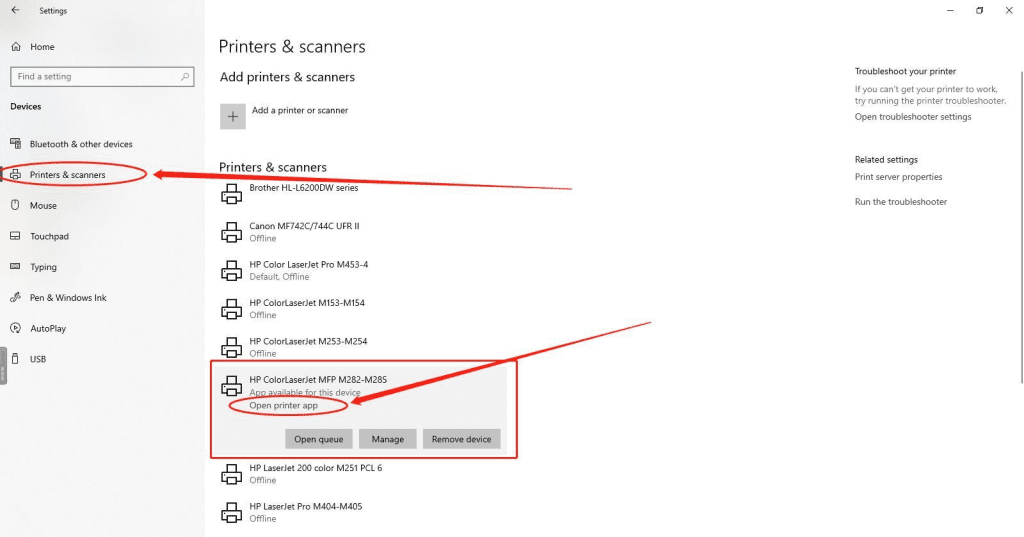
2. Click “Printers and Scanners” to find your printer, then click on it and select “Open printer app“.
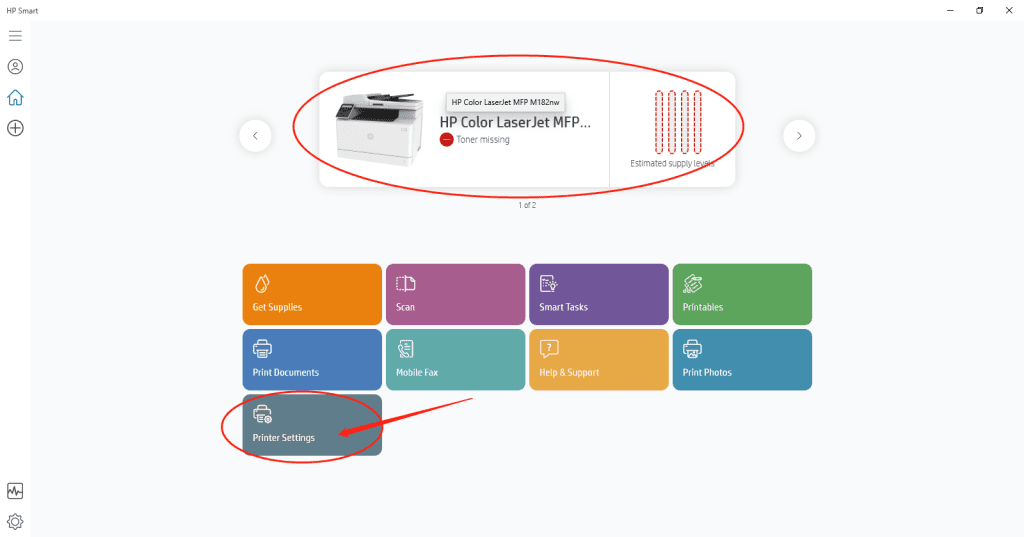
3. The page jumps to “HP Smart“, select your printer and then click “Printer Settings“.
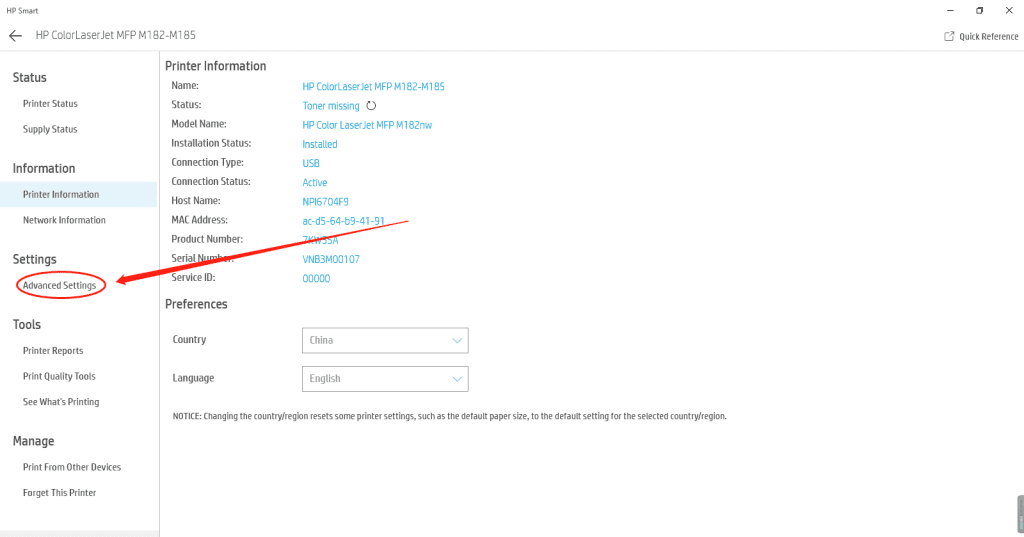
4. On the left side of the opened page, find “Advanced Settings” and click to enter.
5. At “Advanced Settings” interface, click “System” to find “Print Density“.

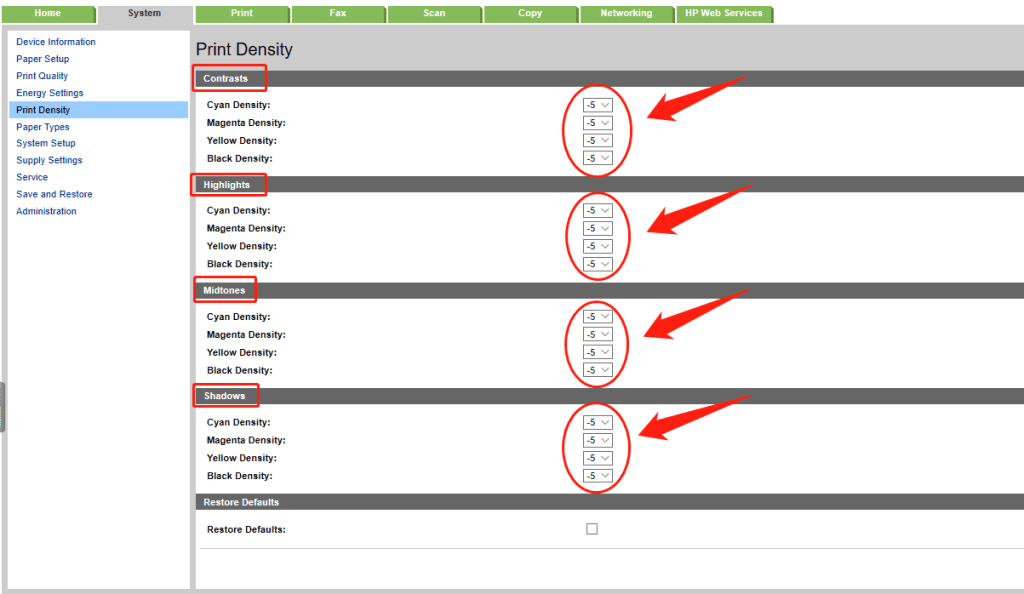
6. Click “Print Density” to adjust density for your printer.

7. In the “Contrasts“,”Highlights“,”Midtones” and “Shadows” option, set the values of “Cyan”, “Magenta”, “Yellow”, and “Black” accordingly. A negative number means to lower the print density. On the contrary, a positive number means to increase the print density.
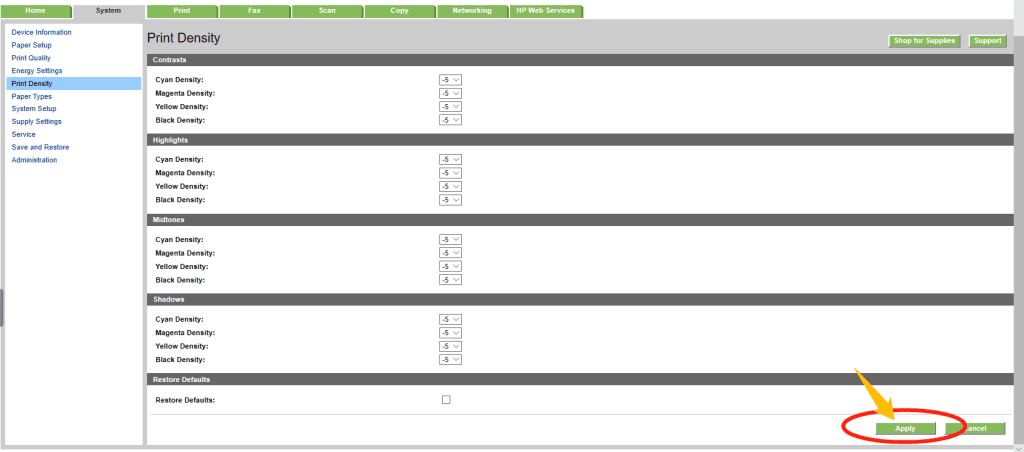
8. Slide down and click “Apply” button to confirm print density adjustment.
Now, your printer should print at the new density! If you have any questions about print density adjustment, please feel free to contact us for help. All YB Toner cartridges are intelligently engineered to perfectly match the print density of the printer’s standard settings. So when using our HP compatible toner cartridges, such as HP 210A toner set you can print clear and sharp text and graphics without adjusting the print density.
- Give us a call at (844) 538-3312
- Chat with us online
- Email us at [email protected]
- Leave a message
- Social medias (Facebook, Twitter, LinkedIn, etc.)

